Guide
How to run a talk on EVOCA
From an empty talks list to a live room with slides, Phone remote, Q&A, and reactions. Follow the screenshots in order — labels match what you see in the dashboard and present view.
Last verified: September 2026
This is the speaker path for a single talk. For multi-day agendas see the tech conference guide; for recurring all-hands, use the town hall guide.
Steps
1.Open Your Talks (empty list)
Go to Dashboard → Your Talks. If you have not created anything yet, the list is empty. Click New Talk to start the wizard.
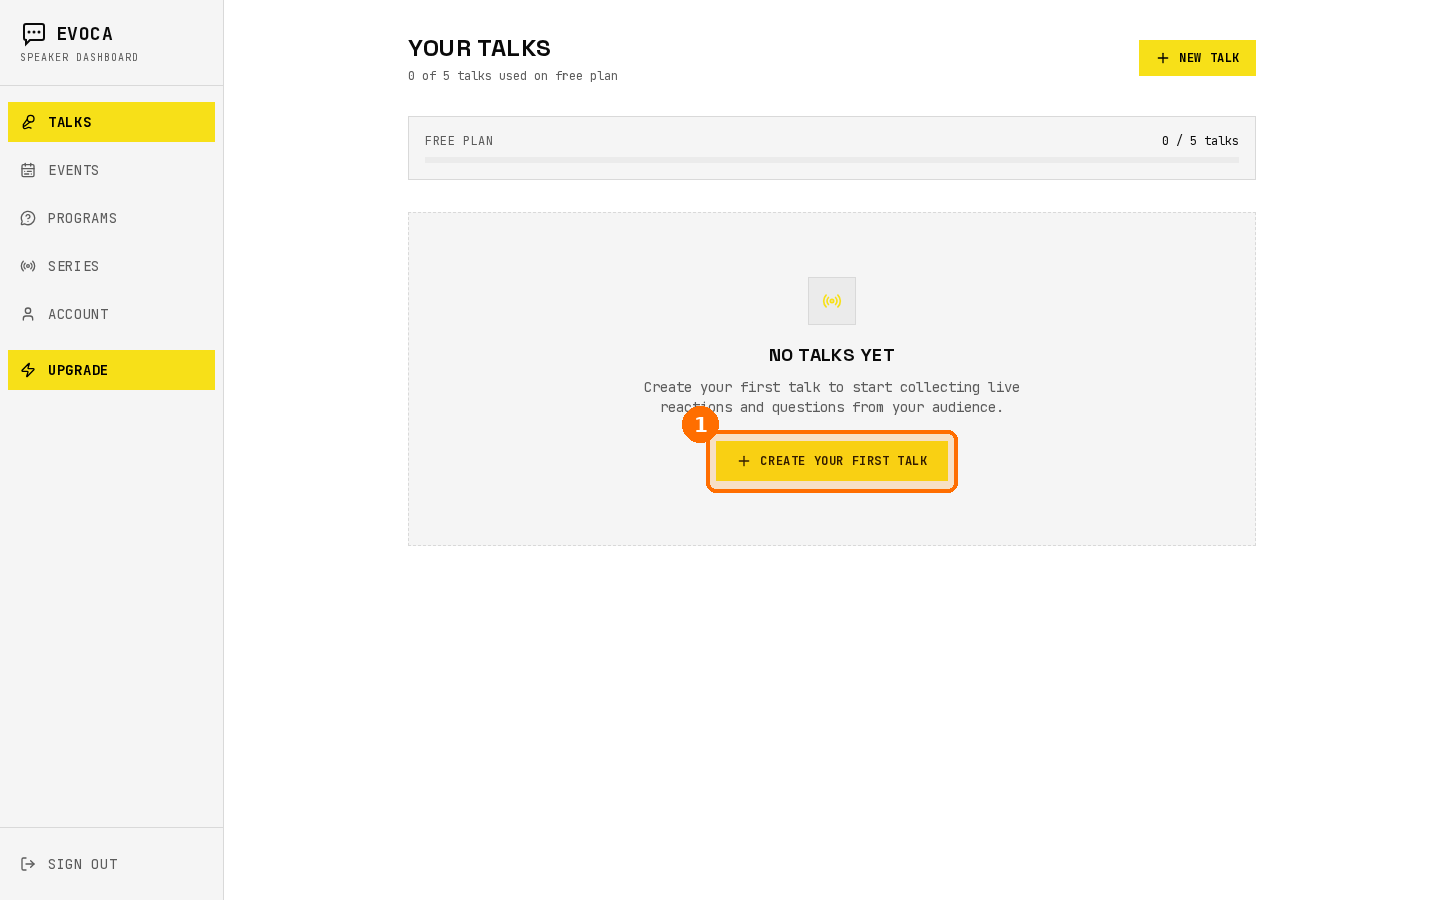
Empty talks list — start here when you have no talks yet. 2.New Talk — title and description
On step 1, enter a title and optional description. Click Next when the fields look right.
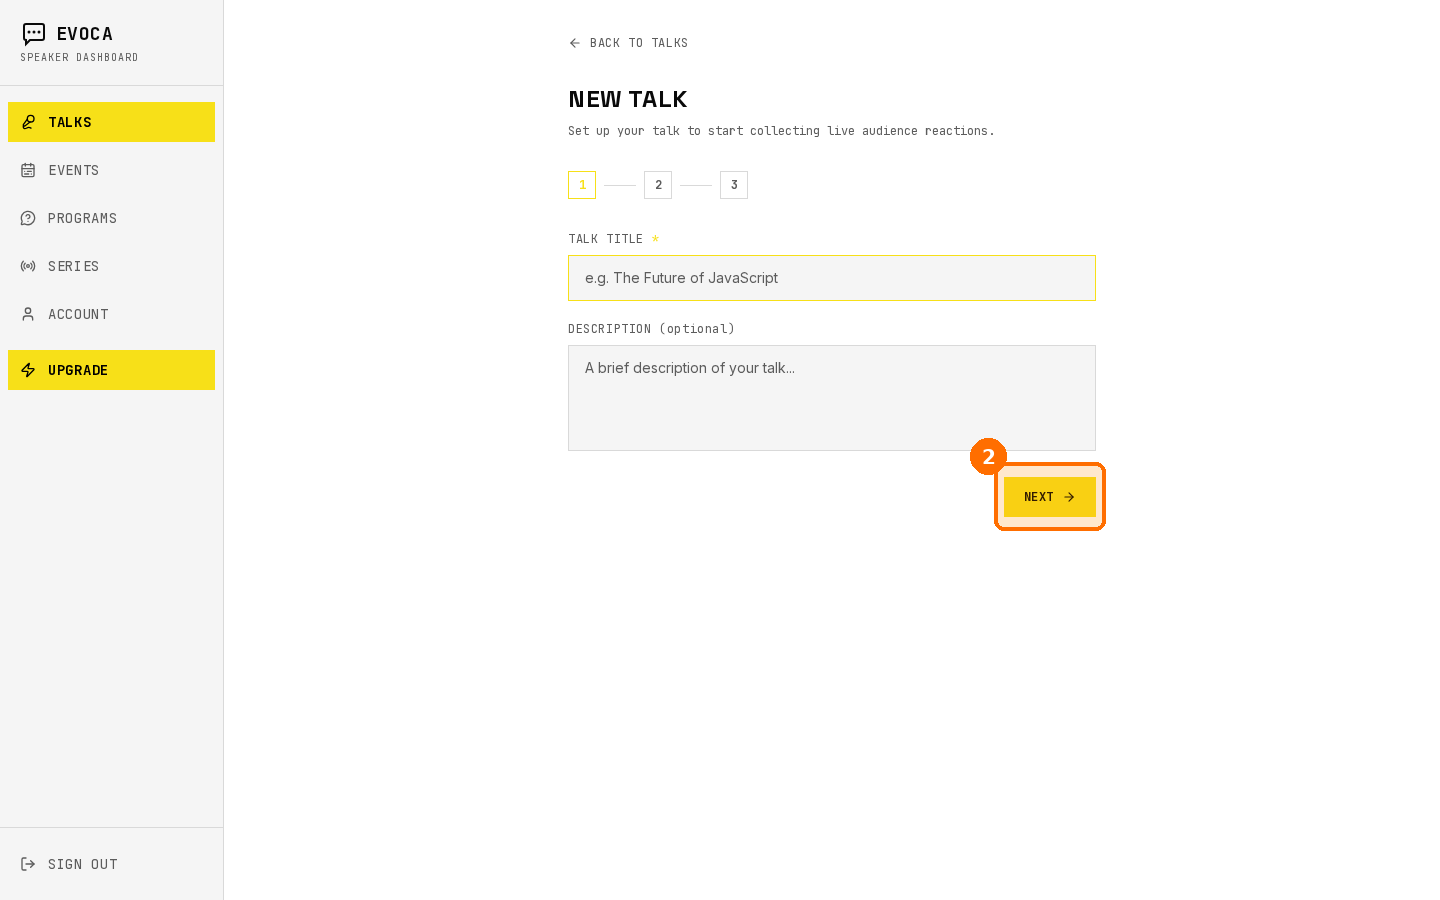
New Talk step 1 — enter title and optional description, then Next. 3.Add slides (embed or upload)
On step 2, either paste an embed URL or upload PDF/PPTX slides. Continue when the deck is linked (or skip and attach later from the talk detail).
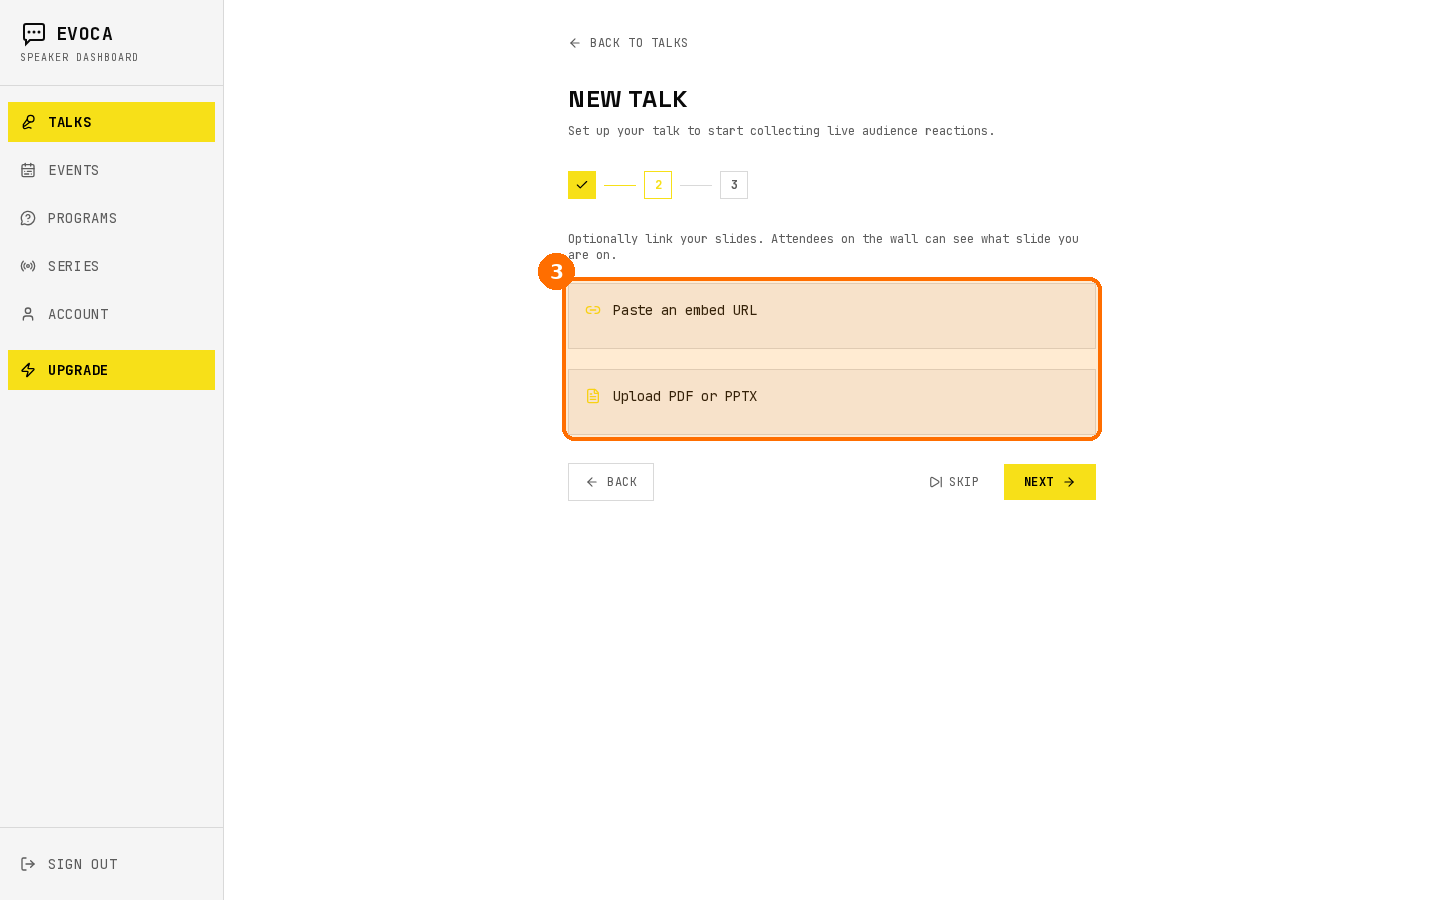
New Talk step 2 — paste an embed URL or upload PDF/PPTX slides. 4.Confirm and create
Review the summary on step 3 and create the talk. You land on the talk detail page.
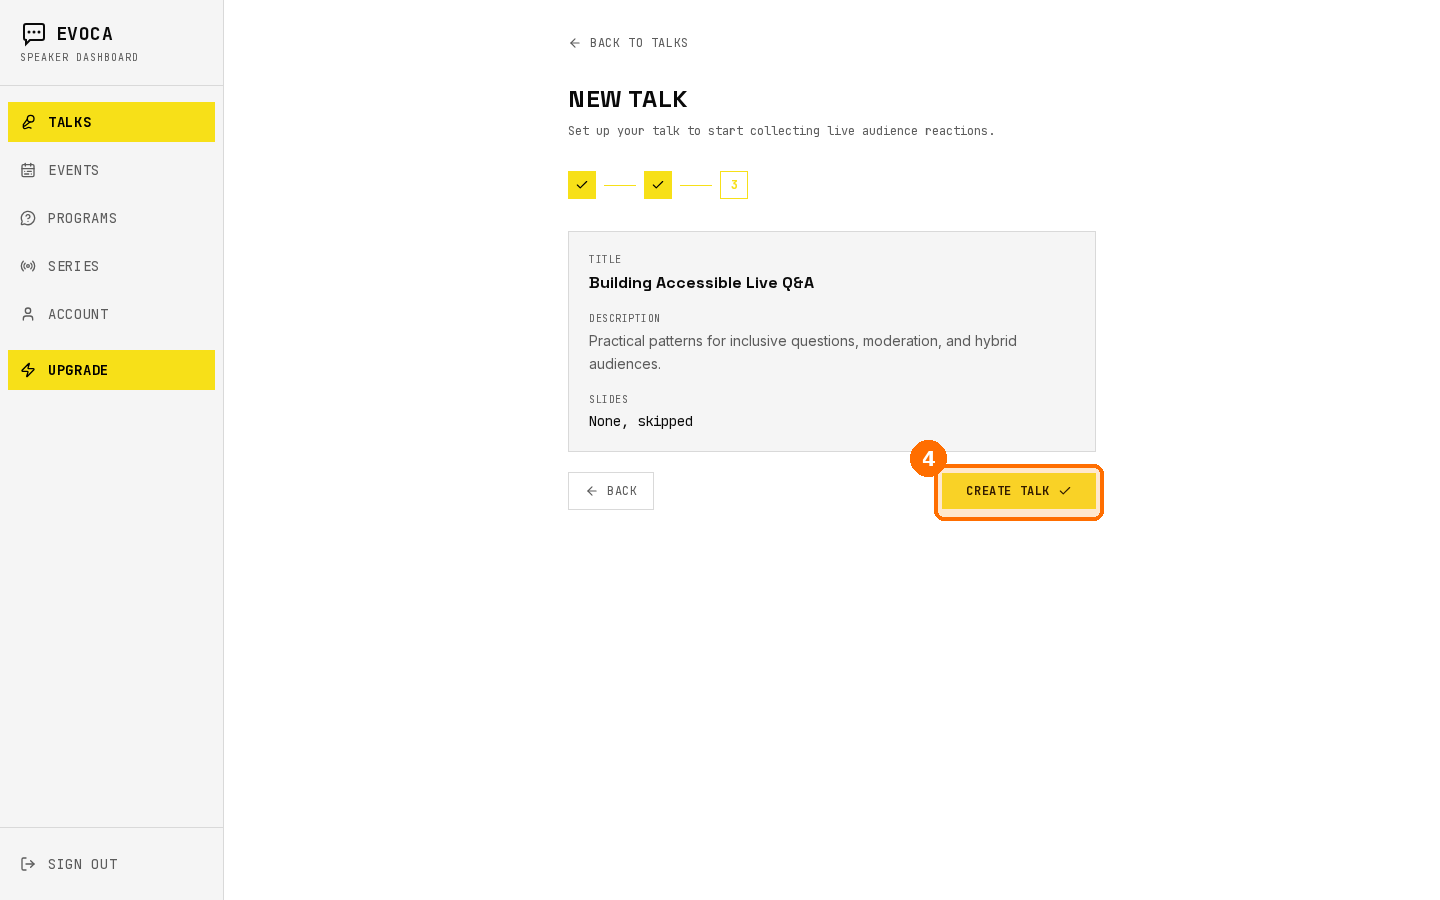
New Talk step 3 — confirm and create the talk. 5.Talk detail — Present when ready
On the talk detail, confirm slides are linked. When you are ready to go live, use Present (or REJOIN if a session is already running).
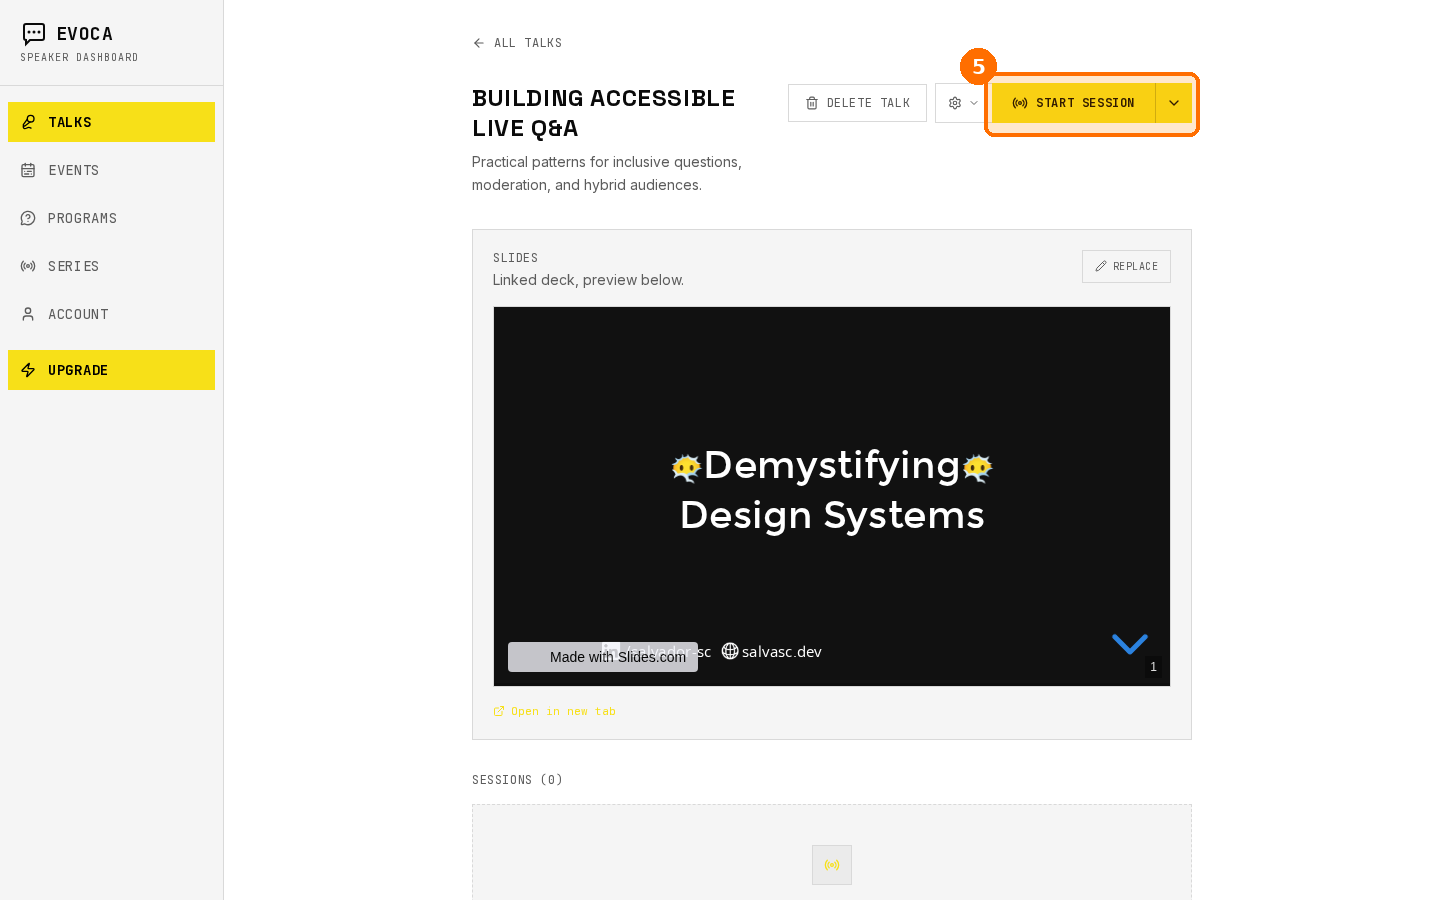
Talk detail with slides — use REJOIN / Present to go live. 6.Open session settings (gear)
On the talk detail, click the gear (session settings) control before or during a session to open the settings panel.
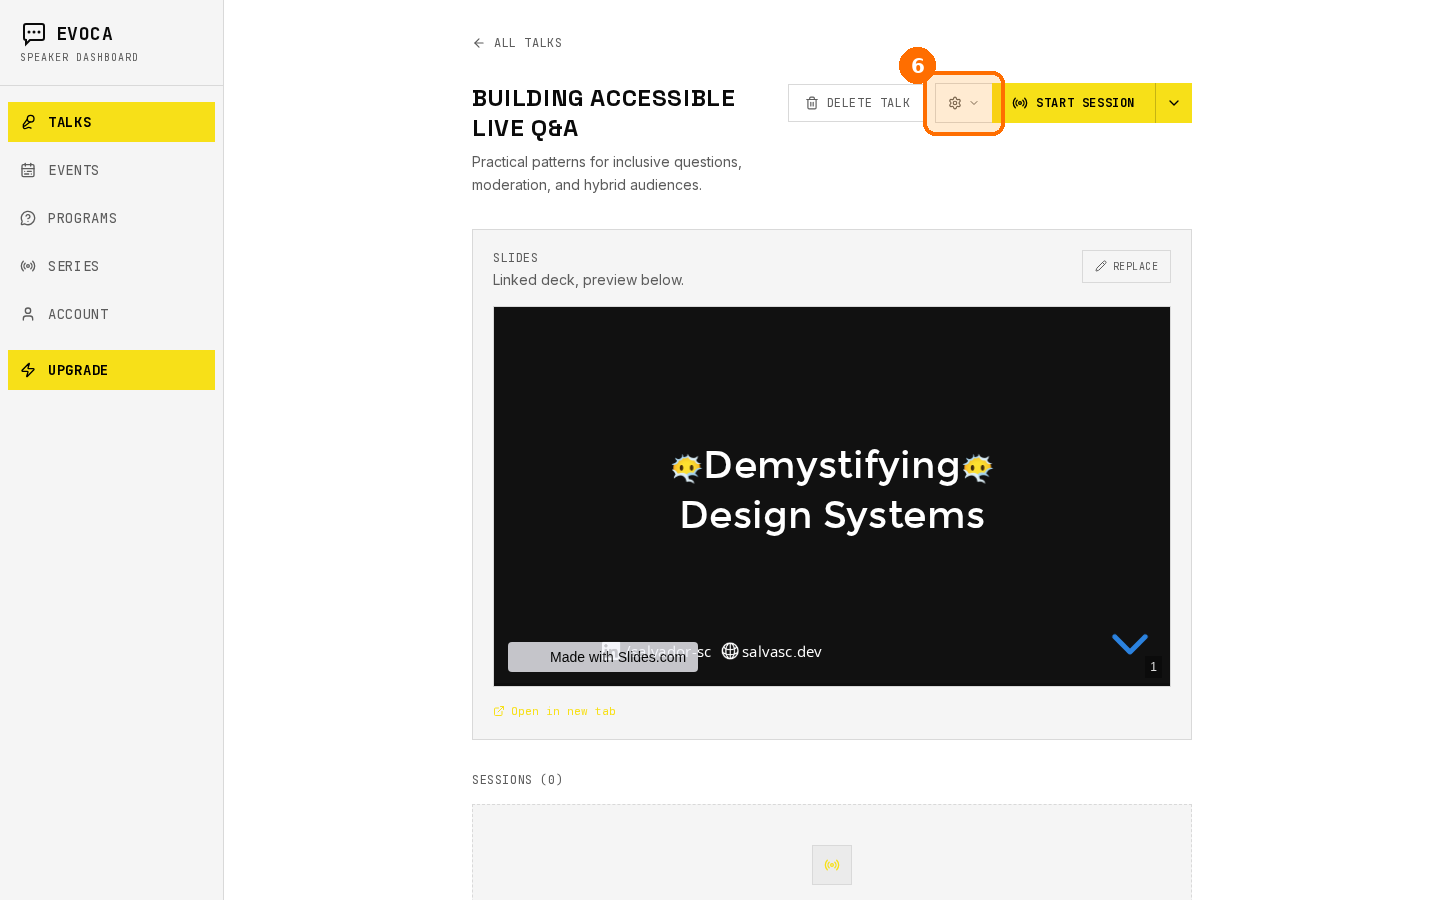
Talk detail — click the gear to open session settings. 7.Session settings
In session settings, tune how the live room behaves for attendees and the wall.
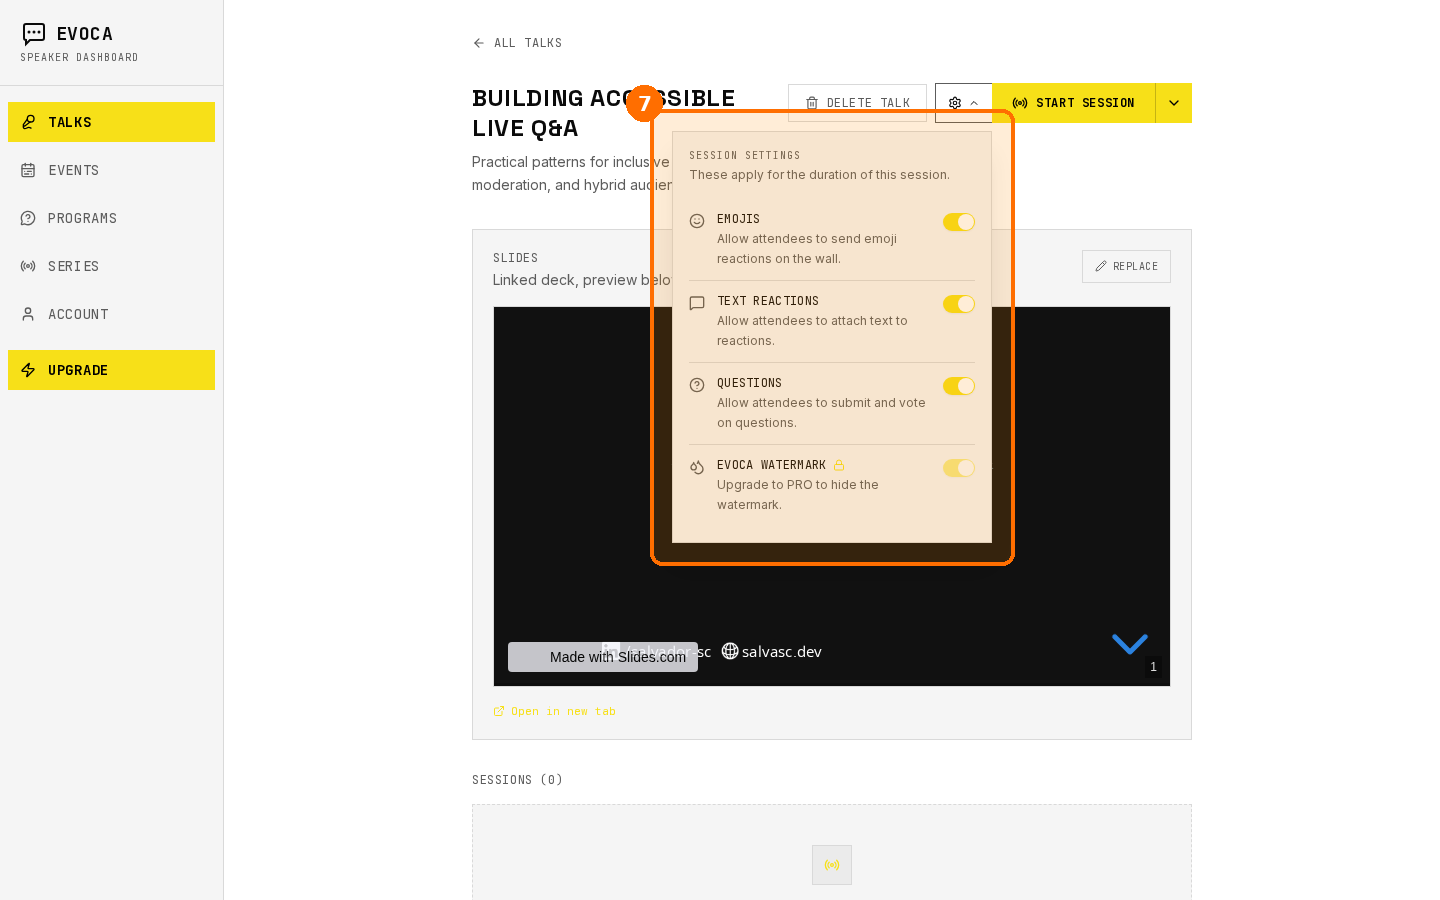
Session settings panel on the talk detail page. 8.Session menu
Use the session menu for extra actions such as starting a test session before the real room fills up.
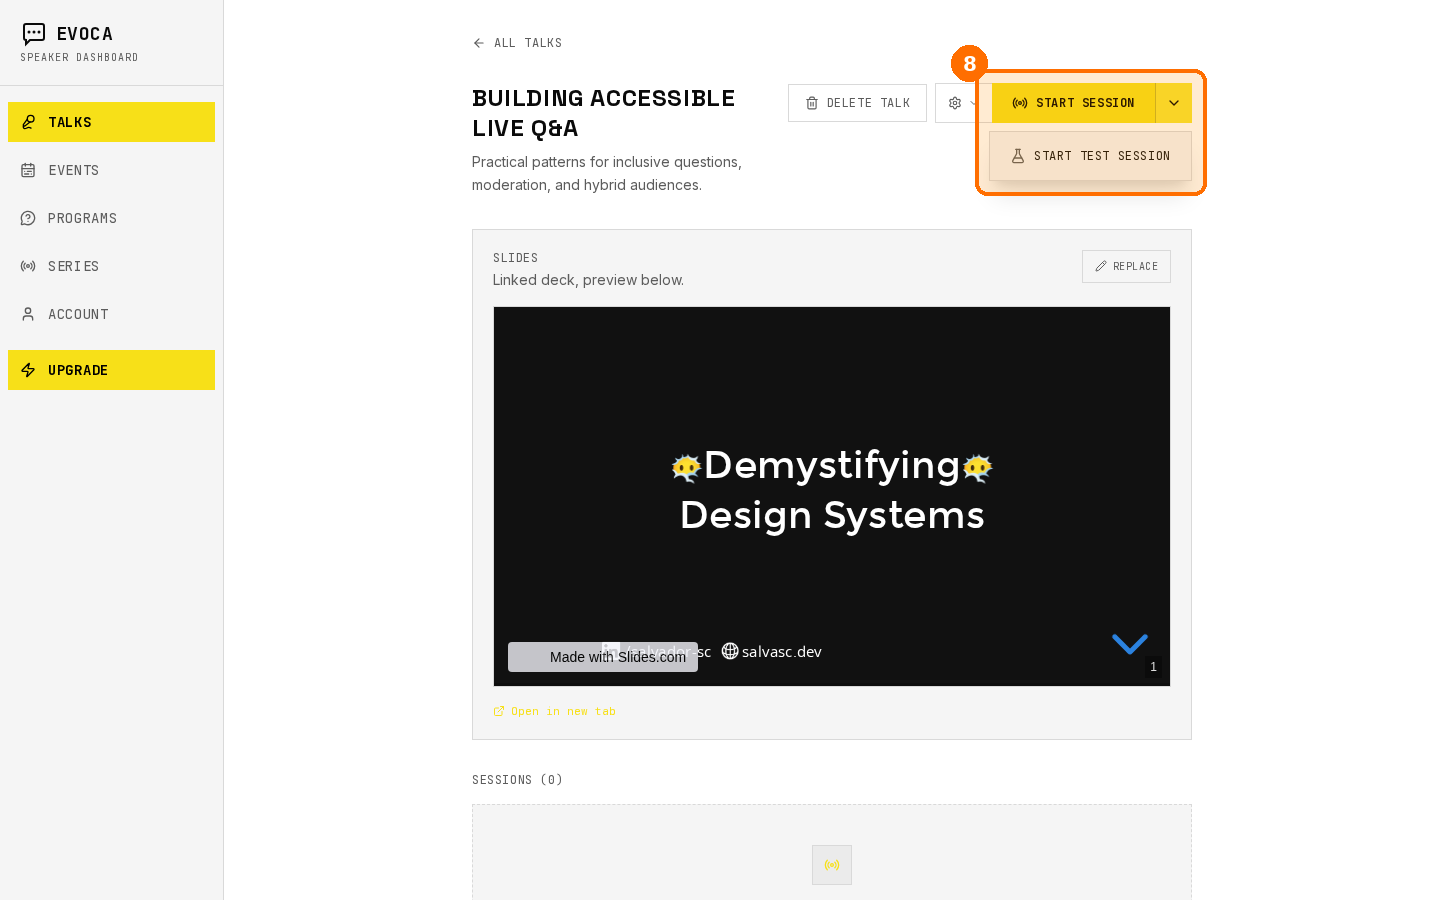
More session options menu (start test session, etc.). 9.Present with slides
The present view shows your slides and the speaker control bar. Advance the deck from here, or continue to Phone remote if you want to control slides from your phone.
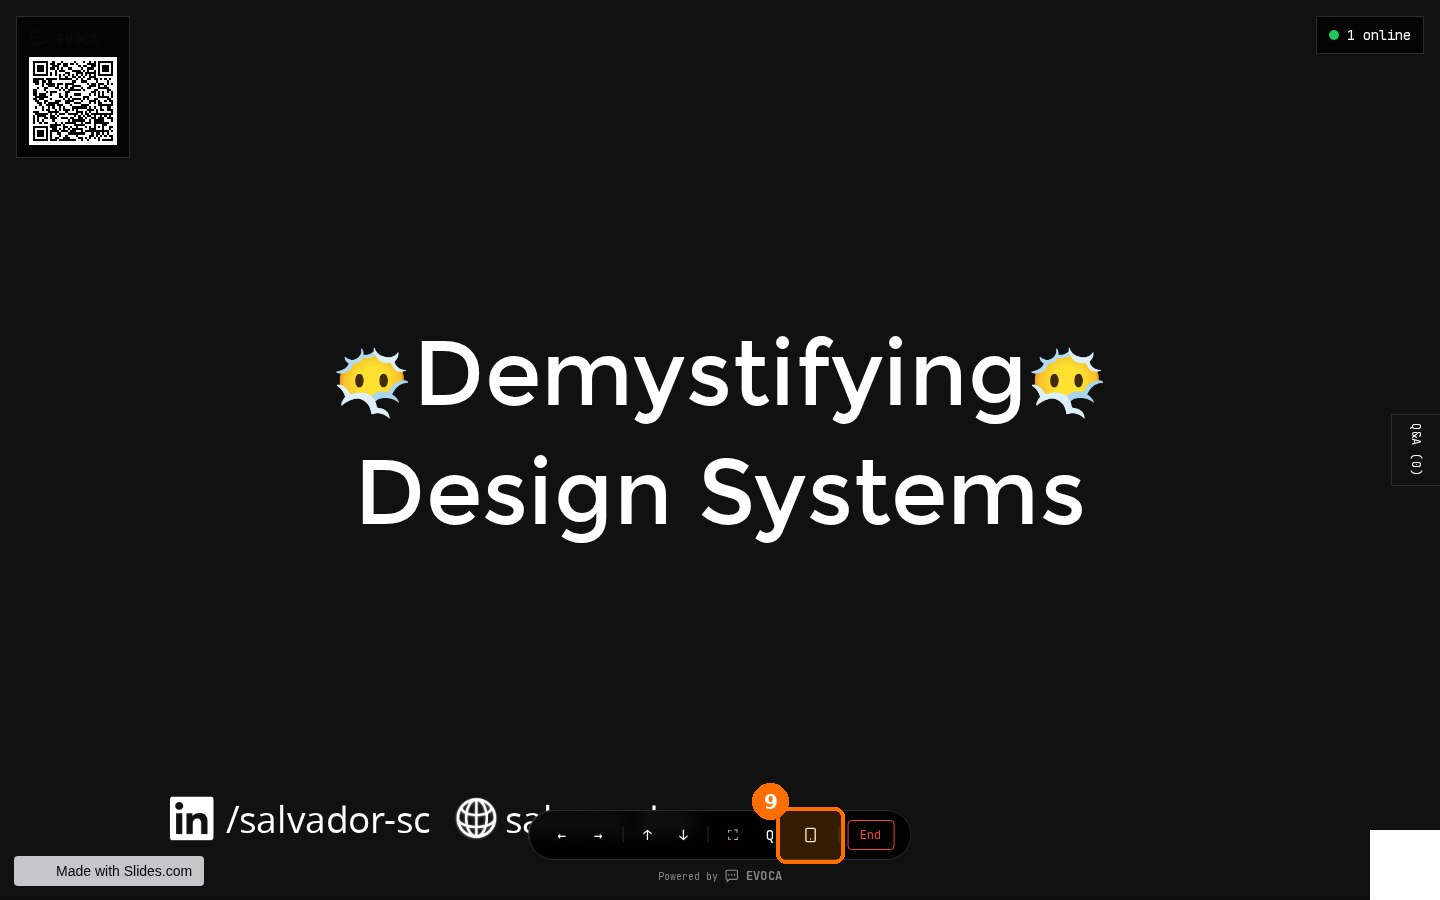
Live present view with slides and speaker controls; Phone remote in the bottom bar. 10.Open Phone remote
Tap Phone remote in the present bar. Scan the QR with your phone to pair the remote.
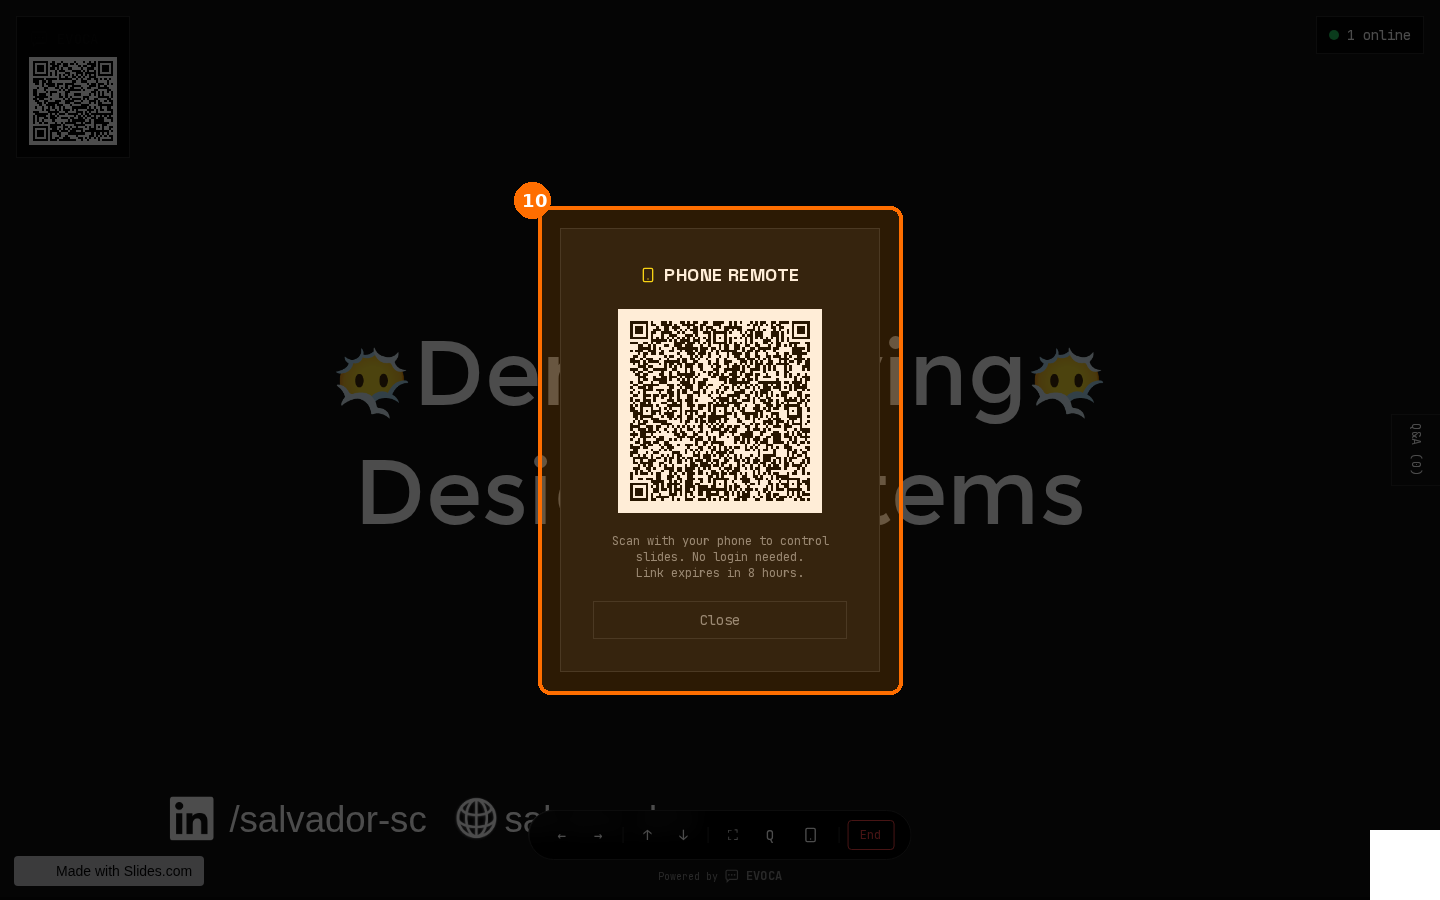
Phone remote modal — scan the QR to control slides from your phone. 11.Control slides from your phone
After scanning, the phone shows the remote control UI so you can move through slides without returning to the laptop.
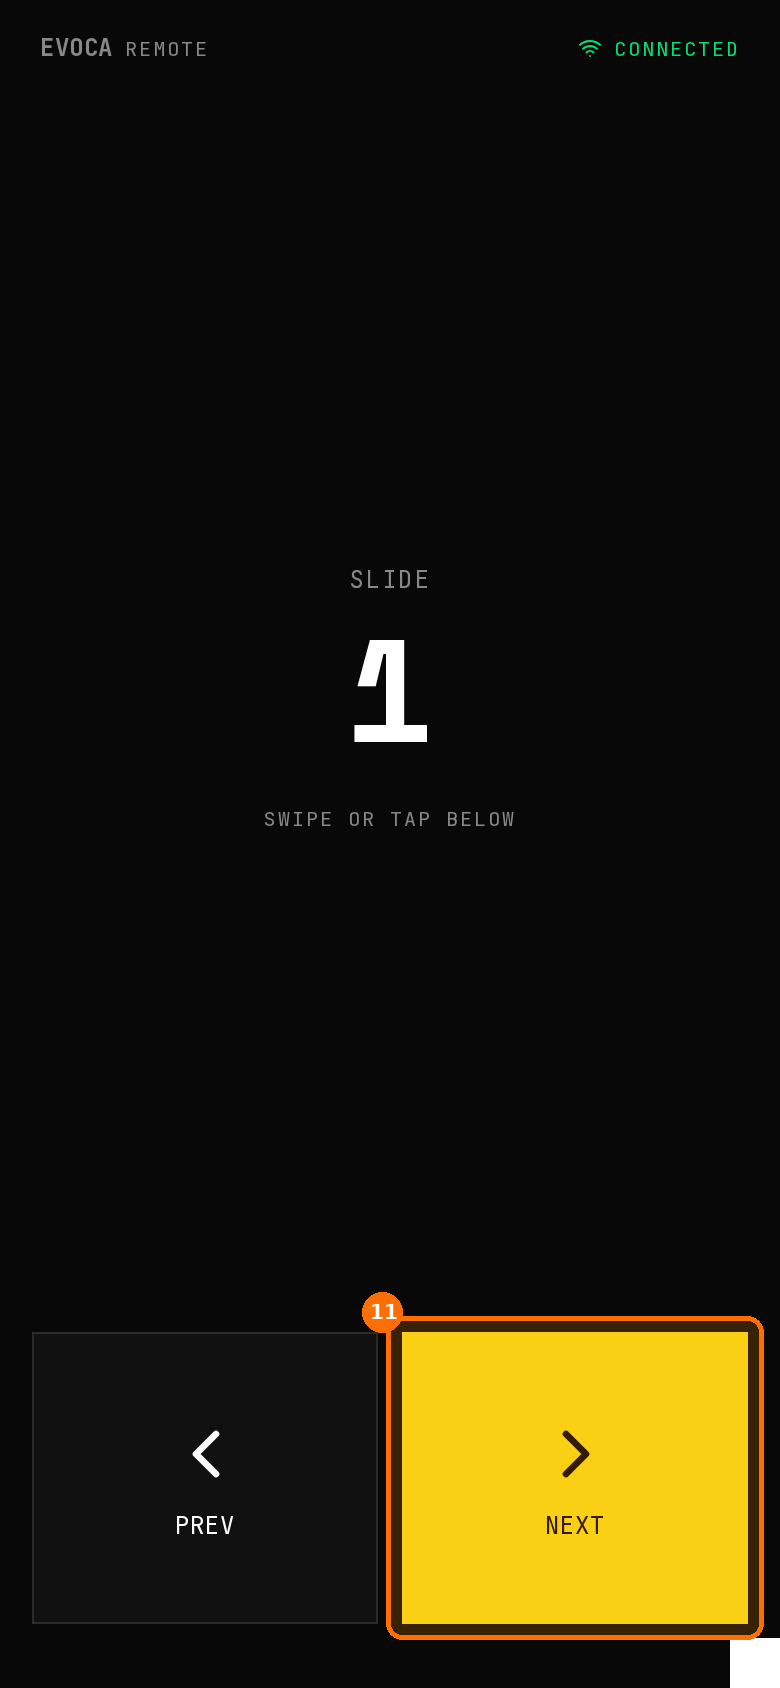
Phone remote control UI after scanning the QR. 12.Moderate speaker Q&A
Open the speaker Q&A view to see incoming questions, prioritize what to answer, and keep the room focused.
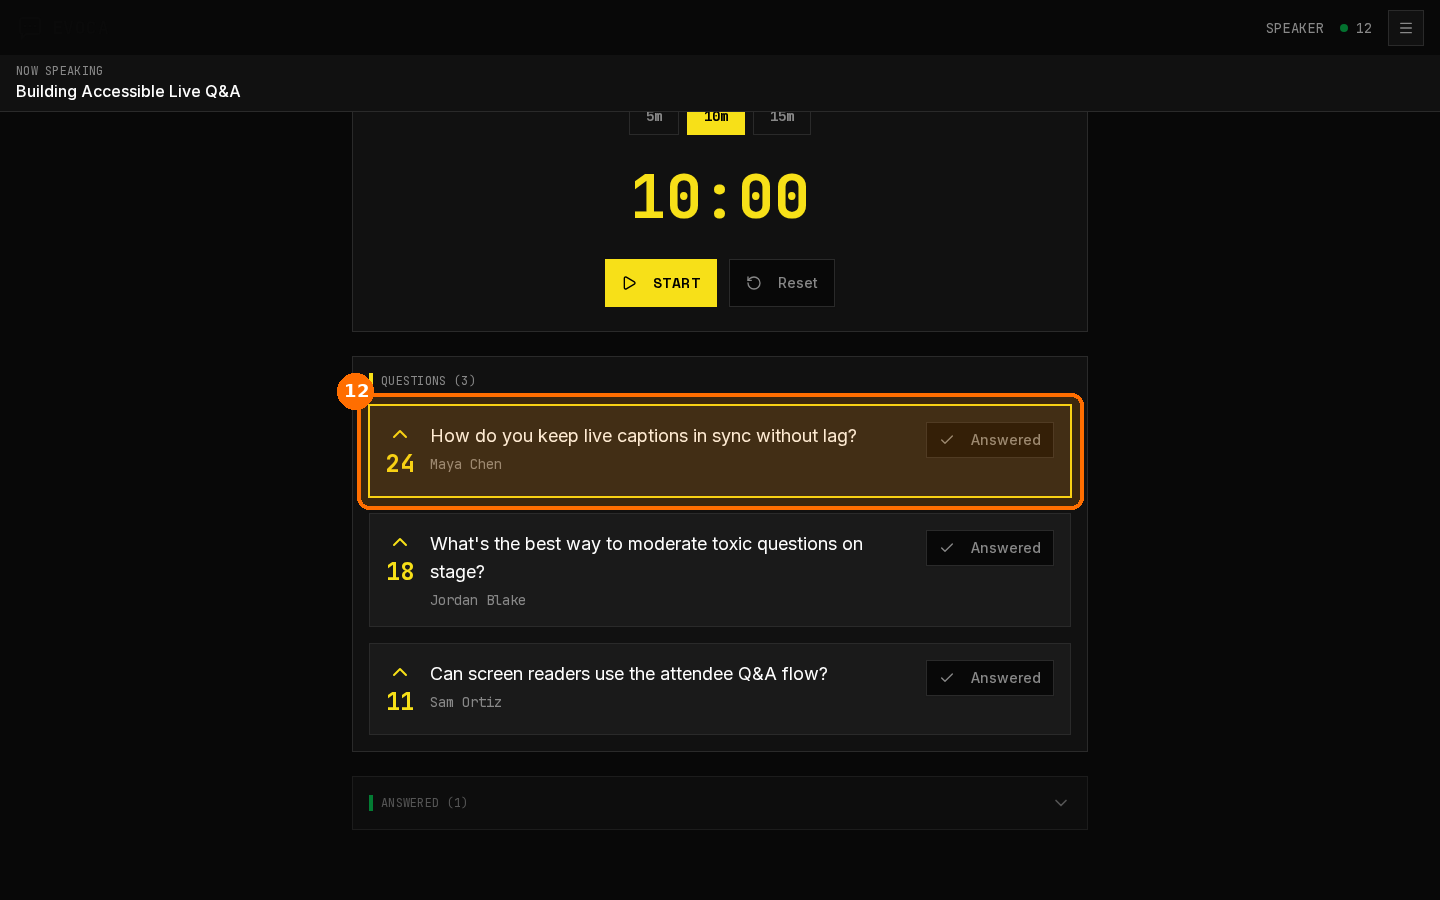
Speaker Q&A moderation view during a live session. 13.Project the live Q&A wall
Put the live wallon a projector or shared screen so the audience follows one Q&A feed together.
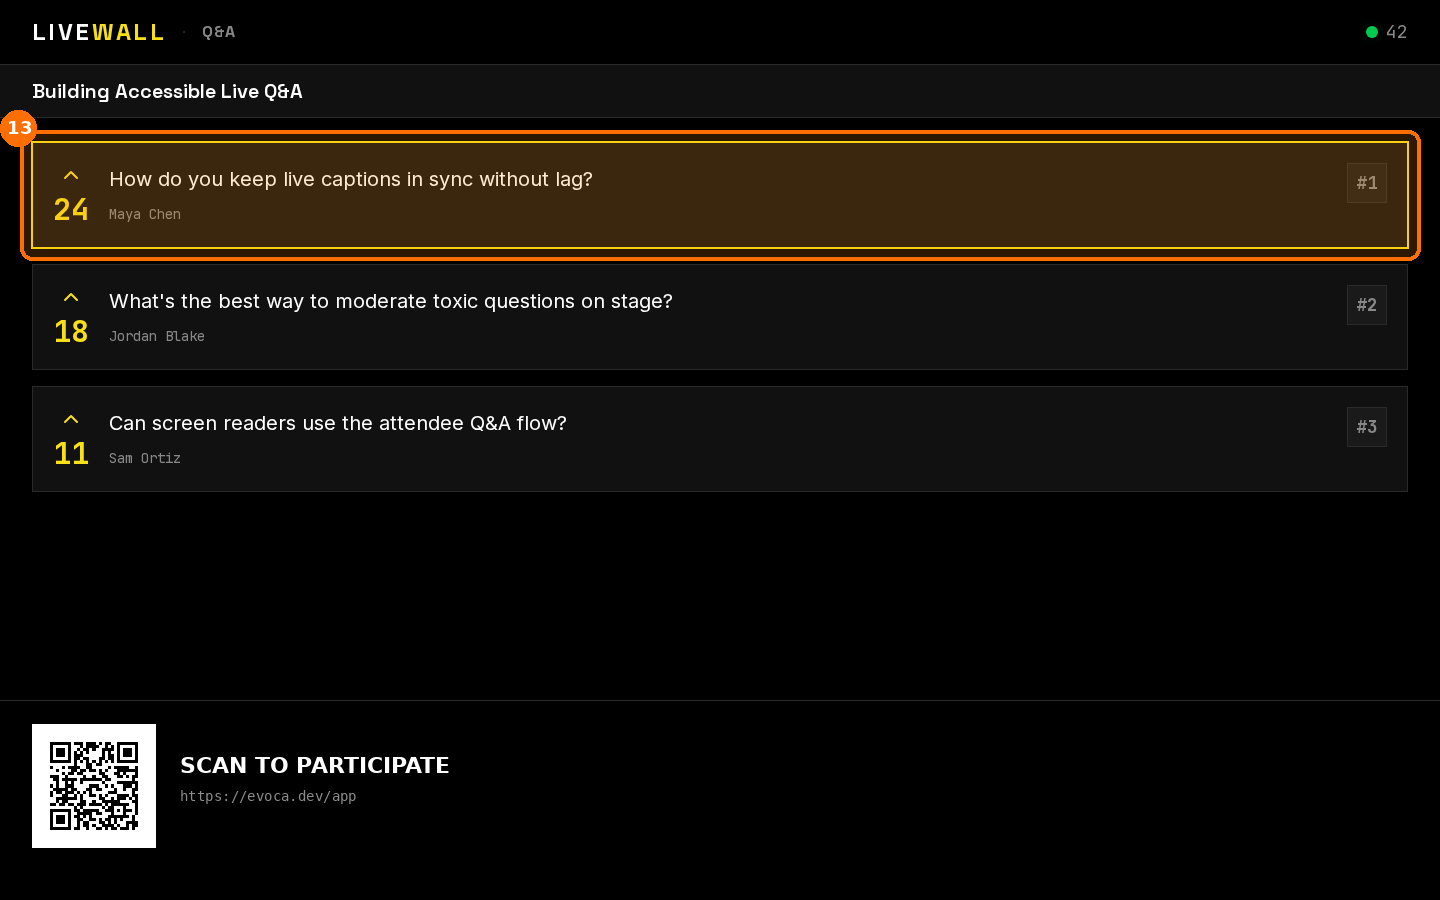
Audience live wall showing Q&A. 14.Show live reactions on the wall
The same wall surface can highlight live reactions so energy in the room is visible without a chat scroll.
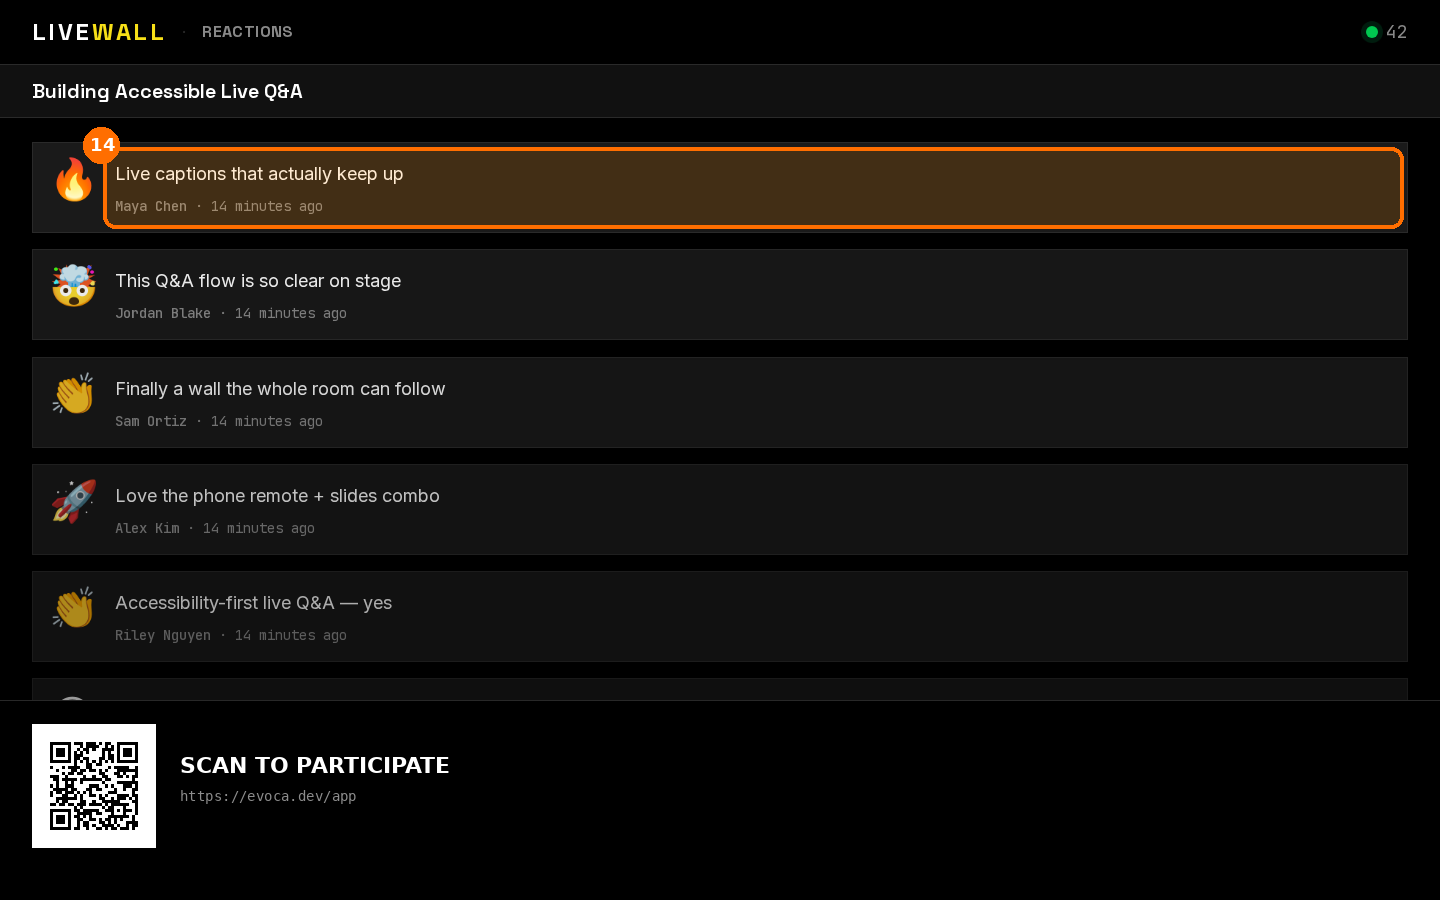
Audience live wall showing reactions. 15.Attendees ask a question
Attendees join via QR or link and use Ask to submit a question. No app download required.
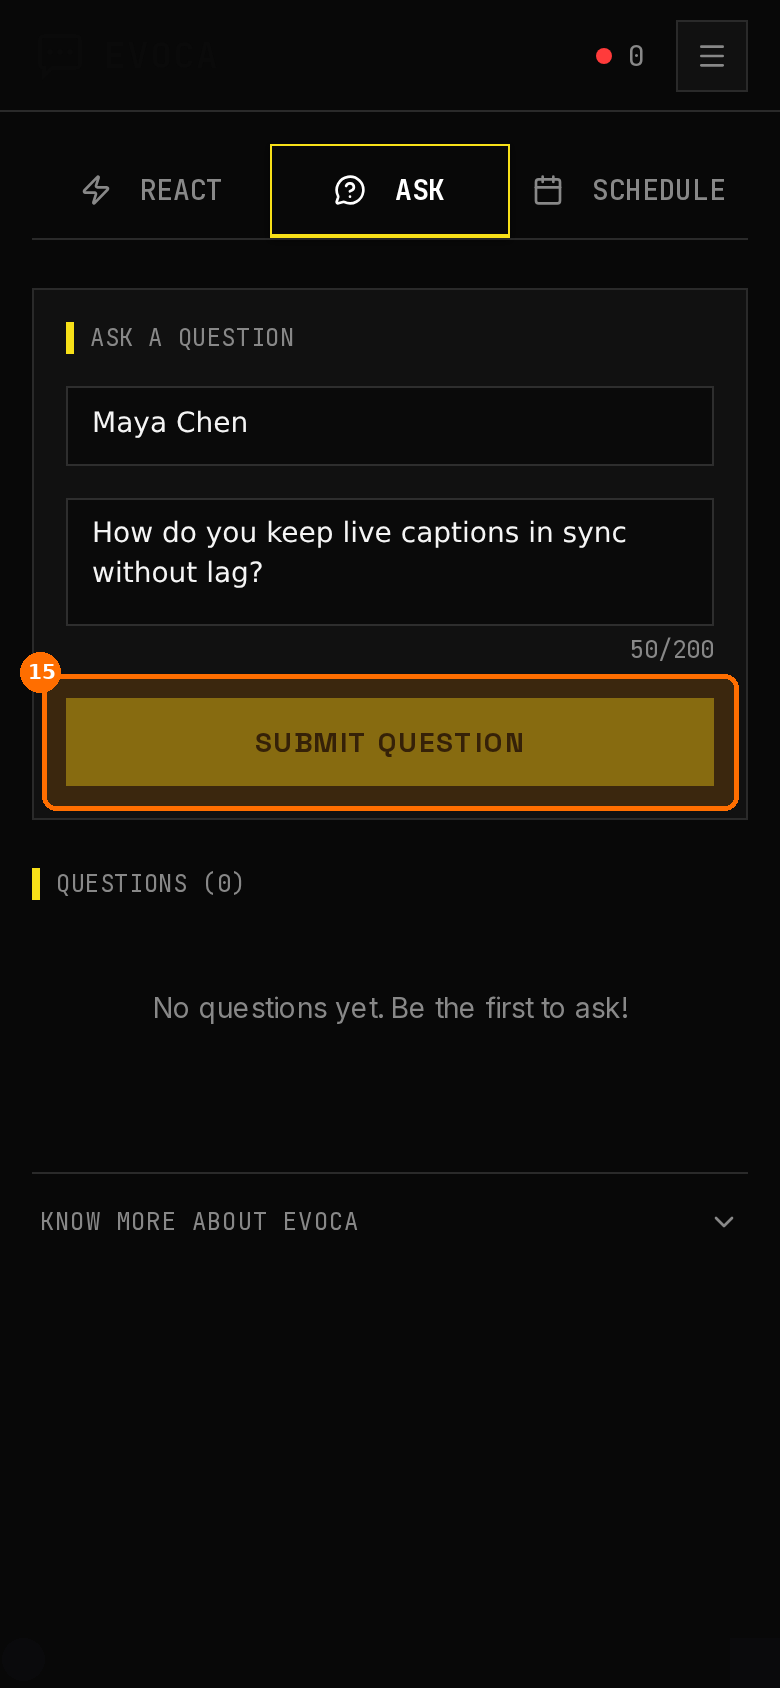
Attendee app — ask a question. 16.Question appears in the list
After submit, the question appears in Questions with votes, and the form clears so attendees can ask another.
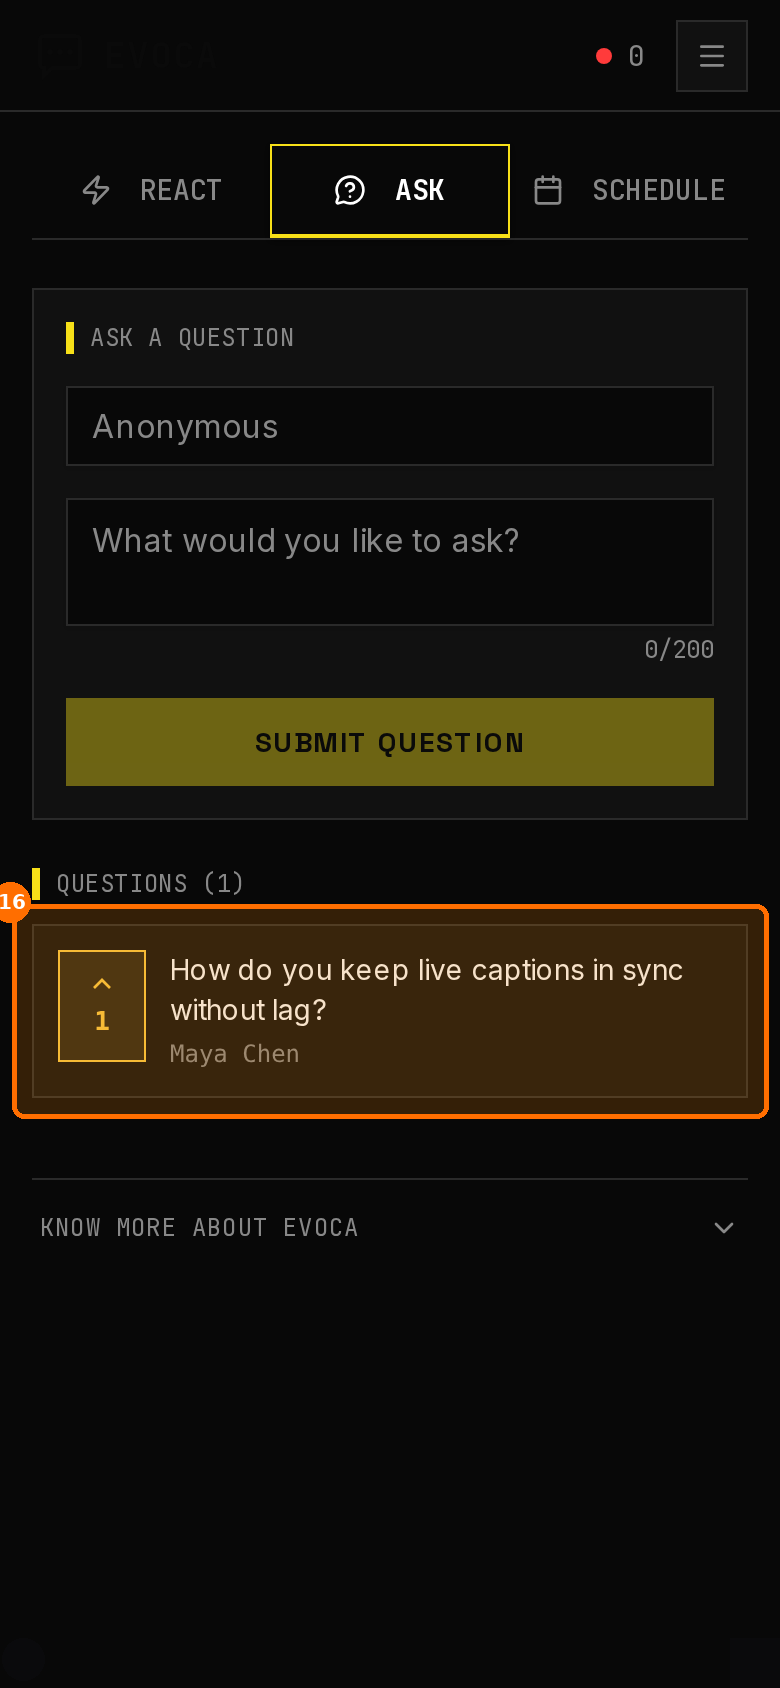
After submit — the question shows in Questions with votes; form clears for another ask. 17.Attendees send reactions
From the same attendee view, people send live reactions that appear on the wall and in the speaker experience.
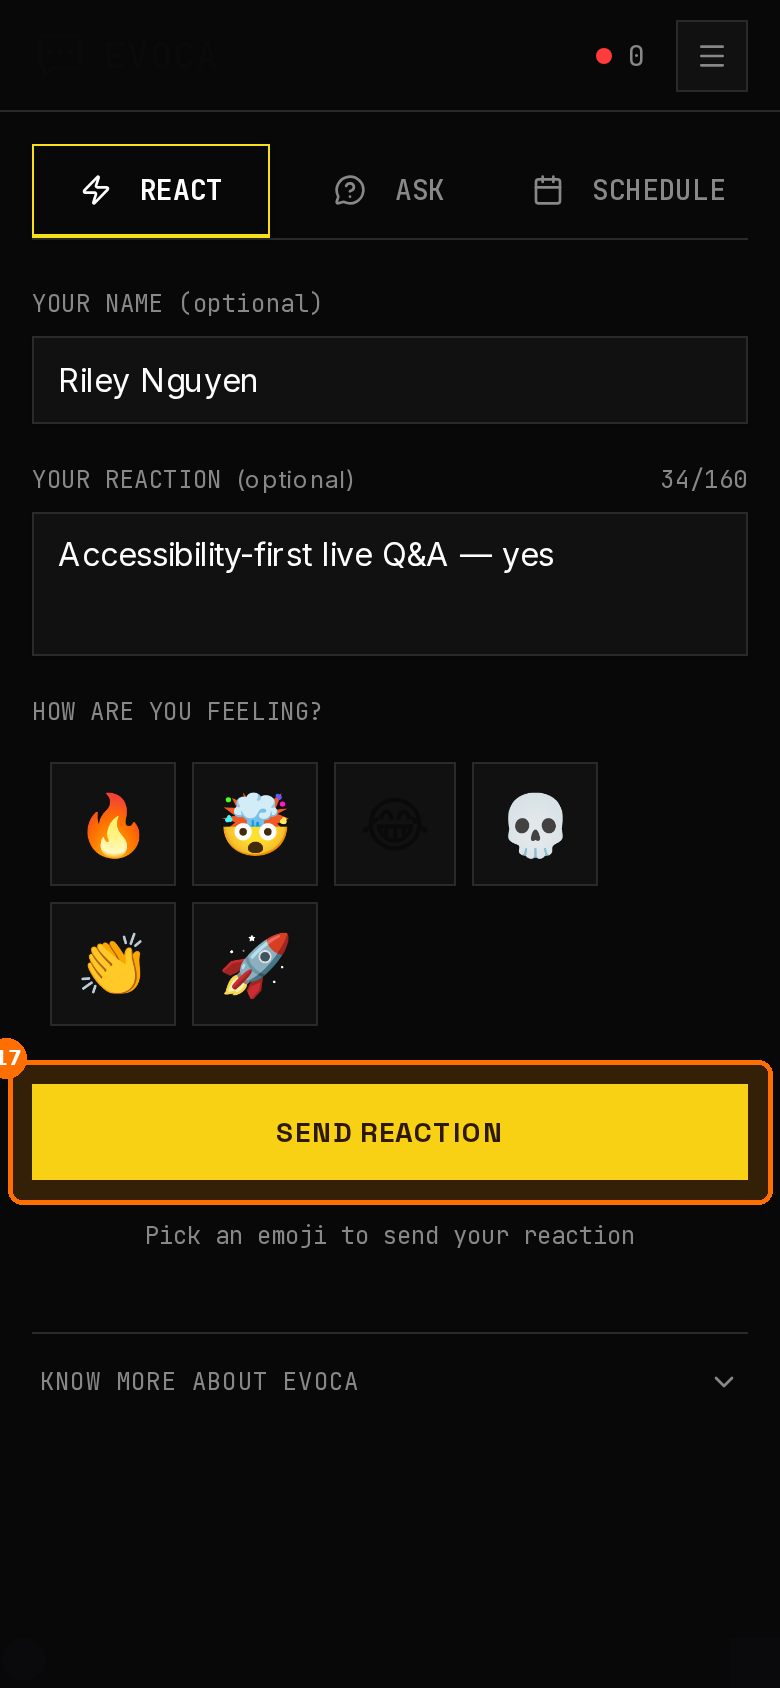
Attendee app — send live reactions. 18.Reaction sent confirmation
After sending, a success banner confirms Reaction sent! Appearing on the wall now. so attendees know it landed on the shared wall.
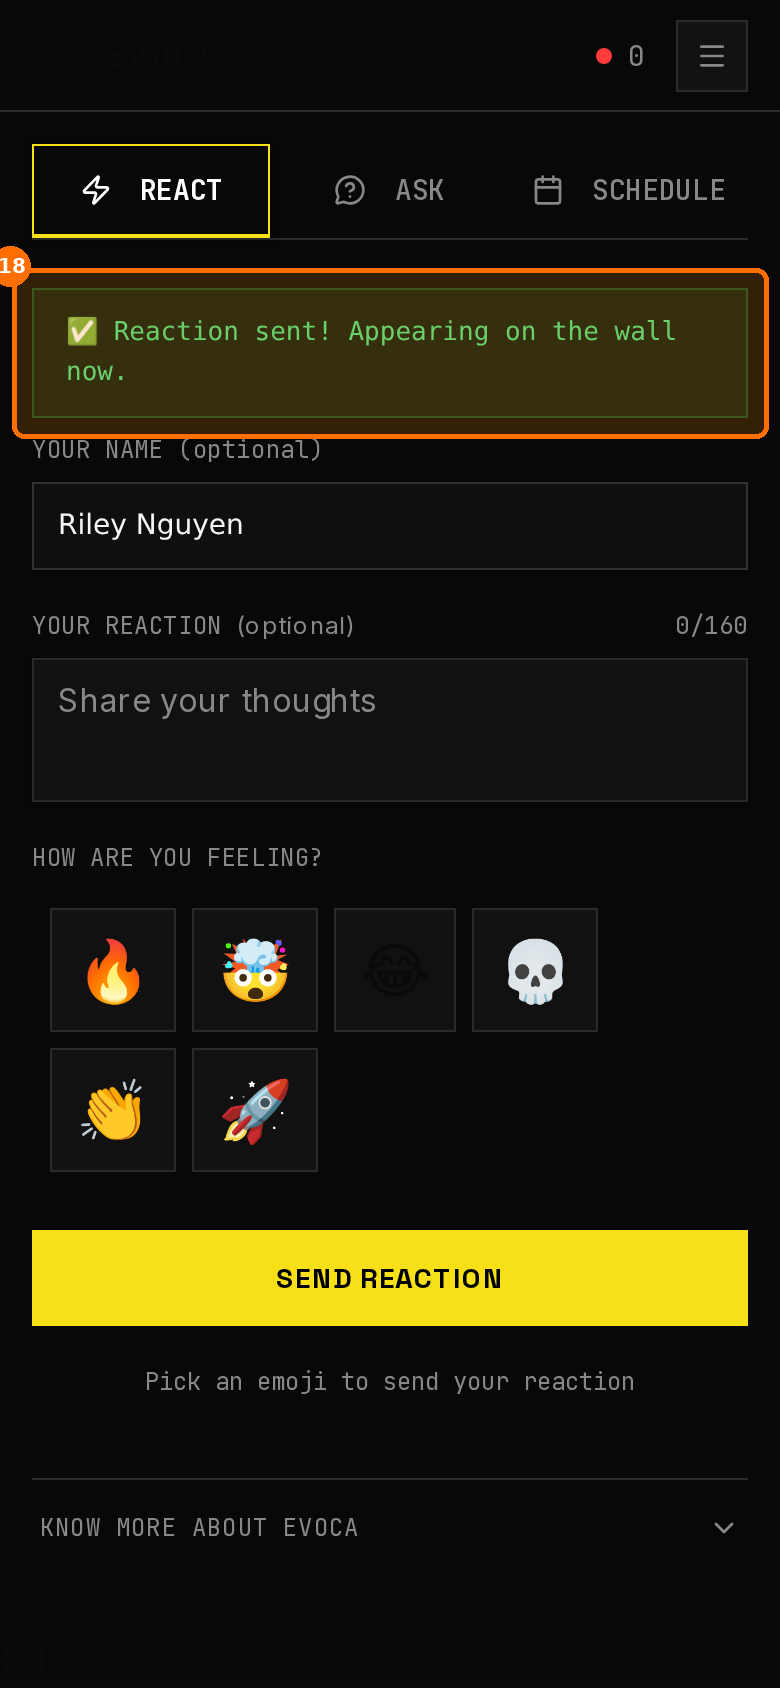
Success banner — "Reaction sent! Appearing on the wall now."
Frequently asked questions
Present your next talk on EVOCA
Free for events up to 100 attendees. Create a talk, add slides, and go live with Present and Phone remote.